Wednesday, June 24, 2015
Tuesday, June 9, 2015
granny-style blackberry dumplin cobbler
Summers here on the farm bring about sporadic rain showers, lemonade on the back porch, the smell of freshly-cut hay bales, and blackberry picking... I LOVE some southern summers! My favorite summertime dessert is blackberry cobbler, hands-down. And I'm not trying to toot my own horn over here but mine is my favorite. So, since it's so scrumptious, I decided to share the recipe with you!
Disclaimer:
This is granny-style y'all. Like put your apron on, and get out your rolling pin (literally). Granny style because I didn't get the recipe from an actual granny, I got the *original* recipe from a Southern Living cookbook. This is my third summer to make it and I have since tweaked it to my liking. But really, this is not one of those throw-it-in-a-dish-and-pour-some-milk-on-top Pinterest things. It's a bit more work, but once you taste it you will NEVER make it any different!
Now get ready to channel your inner granny!
Disclaimer:
This is granny-style y'all. Like put your apron on, and get out your rolling pin (literally). Granny style because I didn't get the recipe from an actual granny, I got the *original* recipe from a Southern Living cookbook. This is my third summer to make it and I have since tweaked it to my liking. But really, this is not one of those throw-it-in-a-dish-and-pour-some-milk-on-top Pinterest things. It's a bit more work, but once you taste it you will NEVER make it any different!
Now get ready to channel your inner granny!
I am a visual learner, so of course I am going to include plenty of pictures for y'all.
Ingredients: This is all you need! Everything is made entirely from scratch.
- 3 cups fresh blackberries
- 1 1/2 cups sugar
- 6 Tbs butter
- 1 cup water
- 2 cups all-purpose flour
- 12 Tbs butter, softened at room temp, not in the microwave
- 3/4 cup cold water
1: Put a metal or glass mixing bowl and a pastry cutter in your freezer for the next 10 minutes or so. Then, gather some fresh blackberries, about 3 cups or so. Wash-em up!
2: Put the berries in a medium pot. Add sugar, the 6 tablespoons of butter, and the cup of water. Don't turn on any heat yet.
3: Get your chilled mixing bowl and pastry cutter from the freezer. Put flour in the bowl (I sift mine to make sure there aren't any clumps). Add the 12 tablespoons of butter and cut it into the flour with your pastry cutter. This will take a few minutes but make sure the butter is well blended into the flour.
4: Gradually pour in the cold water as you knead the dough into a ball with your hands. Form into a dough ball and put it on wax paper. Don't add any more water or your dough will be too sticky. Yes. I learned the hard way...
Then, add some flour to your rolling pin and roll out the dough.
Put the dough into the freezer to chill while you work on your blackberries, and go ahead and preheat your oven to 420 degrees.
5: Turn your blackberries on medium heat. Bring to a boil until the juice gets thick and syrupy.
6: Get your chilled dough from the freezer. Use a pizza cutter to cut into long strips. Save about half the strips for the top of the cobbler, and cut the other half of strips into small pieces for dumplings.
7: Drop the dumplin pieces into the boiling blackberries and stir. Let cook for 5-10 minutes or until all the dumplin pieces are cooked.
8: Pour the blackberry mixture into a greased square (8x8 or 9x9) dish. Top with the dough strips you saved and sprinkle with sugar. Bake at 420 for 20-25 minutes or until dough on top is browned. Let cool then serve. Preferably with vanilla ice cream. YUM!
Wednesday, June 3, 2015
welcome to the world
Rewind to last Thursday... Typical day, another typical doctor appointment that went down like all the other ones: waiting room boredom, pee in a cup, finger prick, wait again, get called to a room, and have my doctor tell me to come back in a week. No progress. I asked about scheduling an induction date and he said we couldn't discuss it until next week. My iron was up at least... woo hoo.
Friday. Typical day. I played with the girls at home, cleaned a little, packed a little more, and we went out to eat that night. When we got home I told Brandon he could use my new tote bag to pack a hospital bag since it was so roomy. I snapped a picture of him packing it because it cracked me up. Such a manly bag.
Let me just say, thank goodness he packed because 2 short hours later I woke up to my water breaking. Still in a half-sleep, surreal state, I just finished up packing for us for the next half hour or so before I woke him up. Nothing like waiting until last minute. That's how we roll. I tried waking Brandon up at first by just nudging him, turning on the lights, calling his name a few times... nothing. But when you're 9 months pregnant, nothing wakes your husband up better than, "You need to get up. My water broke." I'm talking about a feet-to-the-floor-in-2-seconds kind of wake up. He called his brother who came to stay overnight so we didn't have to wake the girls.
We set off to Birmingham. It was game time.
When we got to the triage room and they began to monitor the baby's heartbeat, we were excited and anxious. Darcy's delivery was nothing short of a nightmare (worst pain of my life) and I was sure I was about to do that all over again. Brandon took my hands and prayed over me and the baby. I felt so much more calm. We were moved to a birth suite and things couldn't have gone any better. Got my IV, pain meds, a NICE epidural (Thank You Jesus), and actually took a nap. I woke up to the nurse telling me it was "time to have a baby". Wow, never took a nap during active labor before, but I was seriously so comfortable. (Again, Thank You Jesus for epidurals!!)
Baby Lee was born at 10:30 am Saturday morning, May 30th. 9 days early and still weighing in at 7 pounds and 13 ounces. In an effort not to reveal the gender until our parents could see for themselves, this was his first picture we sent to close friends and family. EPIC.
He is perfect. After a day with no name, we finally decided on Lawrence Porter. We will call him Porter. (Or baby, hunny, sweetie, whatever.) I can totally tell he will be is a momma's boy. ;)
Sisters came to see brother the next day, and they LOVED him. Darcy didn't want anyone holding him except her, but look how proud she is. She actually left the hospital kicking and screaming, "MY BABY!!!" Watch out, future girlfriends, you'll have to pass thorugh these two little mommas first. Bless your heart.
Daddy went and picked out his going-home outfit and a sweet quilt.
We seriously had the best birth experience. Awesome nurses, awesome family and friends who went out of their way to keep Darcy and Addie happy. And aside from being exhausted, I am feeling totally fine, and already *almost* normal again. Porter is adjusting well to (loud and crazy) life here on the farm and we are over the moon.
Blessed.
So blessed.
Tuesday, May 26, 2015
d-day packing and prep plus a GIVEAWAY
I'm 38.5 weeks pregnant with baby Lee #3 who we still don't know yet is a boy or girl. I can't believe we are getting to find out when we meet him or her for the first time! I have been busy packing and getting ready for the big day since Addie and Darcy both came before their due dates.
This evening Addie and I worked on making thank you bags for our nurses. We did this for our nurses before I had Darcy but this time she was a HUGE help. She organized everything into neat piles and packed all the bags herself! I wrote thank you notes for each bag and tied ribbons. In each bag we put a thank you card, some hand sanitizer, a pen, gum, and some chocolate. She made a bag for her Daddy too, and wrote him a note because she said he is the "best Daddy in the whole world." I have to agree. ;)
After that I spent some time packing more stuff for the hospital. It never ends. I keep thinking of stuff we need... I know I'm still going to forget something. I guess we'll make do. The part I like the most is packing a bag for the newest little. I have boy stuff and girl stuff in the bag and we still haven't decided on a name... #thirdchildprobs I guess. Either way, I. CAN'T. WAIT.!!!
That's when I got the idea to do a giveaway!
This evening Addie and I worked on making thank you bags for our nurses. We did this for our nurses before I had Darcy but this time she was a HUGE help. She organized everything into neat piles and packed all the bags herself! I wrote thank you notes for each bag and tied ribbons. In each bag we put a thank you card, some hand sanitizer, a pen, gum, and some chocolate. She made a bag for her Daddy too, and wrote him a note because she said he is the "best Daddy in the whole world." I have to agree. ;)
| Packing for FIVE people... Really not into it. |
It's summer and I have a SUPER CUTE new applique design I would love to put on a beach towel for someone... Here's how to play! In the comments section here or on facebook, guess the following FOUR things:
- Baby's gender
- Baby's date of birth (My due date is June 7. Addie was 4 days early, Darcy was 3 days early.)
- Baby's weight
- Baby's length
Good luck, friends! :)
diy furniture painting
I am posting this as a tutorial for anyone who can use it because I have had some friends ask me.
**Disclaimer: I am by no means an expert and there are tons of ways to re-do furniture. This just happens to be how I do it. I taught myself how to do pieces through trial and error and a whole lot of Pinterest. ;)
Now, the not-so-professional tutorial from yours truly...
1. Find it.
Find a piece that is REAL wood. Do not use pressboard material, plastic, or coated material. The paint will not adhere and will scratch right off. For my most recent project we found a dresser at the Leeds Antique Flea Mall for $100. This is a horrible photo I know... I had already taken out the drawers. Sorry.
2. Prime it.
I personally like pieces that are distressed or vintage-looking. For this reason I always begin with a coat of white paint (doesn't have to be primer). This is because when you get to the sanding step, your white paint will show through. This dresser was already white so I skipped that part, however, if your piece doesn't have a white coat on it, just slap it on. Really, don't worry about being all neat and stuff. Slap it on and go. If you're re-doing a piece with a top-coat (like shiny polyurethane) and you don't want to strip it, just use a coat or two of primer. I have done this both ways and can't tell a major difference either way. Below is a piece I did with primer as the first coat because I didn't want to strip the poly coat off. It turned out fine to me!
I suggest doing two coats of paint. Paint with the grain of the wood, not against it. Of course, let it dry between coats. If you're using chalk paint it won't take long at all. Next you're ready for sanding!
**Disclaimer: I am by no means an expert and there are tons of ways to re-do furniture. This just happens to be how I do it. I taught myself how to do pieces through trial and error and a whole lot of Pinterest. ;)
Now, the not-so-professional tutorial from yours truly...
1. Find it.
Find a piece that is REAL wood. Do not use pressboard material, plastic, or coated material. The paint will not adhere and will scratch right off. For my most recent project we found a dresser at the Leeds Antique Flea Mall for $100. This is a horrible photo I know... I had already taken out the drawers. Sorry.
2. Prime it.
I personally like pieces that are distressed or vintage-looking. For this reason I always begin with a coat of white paint (doesn't have to be primer). This is because when you get to the sanding step, your white paint will show through. This dresser was already white so I skipped that part, however, if your piece doesn't have a white coat on it, just slap it on. Really, don't worry about being all neat and stuff. Slap it on and go. If you're re-doing a piece with a top-coat (like shiny polyurethane) and you don't want to strip it, just use a coat or two of primer. I have done this both ways and can't tell a major difference either way. Below is a piece I did with primer as the first coat because I didn't want to strip the poly coat off. It turned out fine to me!
3. Paint it.
After you have a coat of white slapped on, let it dry. Then paint a coat of paint in whatever color you choose with a good brush. Mine is a 2" or 3" brush. Don't use an "economy" brush, or you'll be picking out bristles the whole time. Spend the extra dollar or two and buy a good one. You can always use it again.
For paint, I prefer chalk paint because it's fast drying, applies well, and has a matte finish. Very easy to work with. For this dresser project I used Annie Sloan Louis Blue, but you certainly don't have to use Annie. Home Depot carries chalk paint, and so do many antique shops. The Leeds Flea Mall had a booth selling some for $20/qt which is a good deal in my opinion. You don't have to use chalk paint though. My red cabinet above was just a little sample of Behr from HD that I had them tint in Country Red.
| This is after 2 coats of chalk paint. Let dry between coats. |
4. Sand it.
Use an orbital sander to "distress" it (if you want). Sand around the edges of the piece and around the edges of the drawers. I like to sand the top and sides in a few areas too to make it seem worn. You really can't mess it up. Just don't get too sand-happy. ;) See how the white shows through? So pretty.
Important! After sanding, use a damp cloth or paper towel to wipe it down thouroghly to remove all the sanding dust.
5. Wax it.
To protect and seal my furniture, I use creme wax as a topcoat. You can buy it for about $5 at Home Depot or Hobby Lobby. I use a piece of lint-free cheesecloth to rub it on. I'm sure a foam brush would work fine too. I apply it liberally and spread it evenly. It dries clear. :)
6. Enjoy it.
You're done! Pretty easy, huh? If you re-do a piece I want to see it! :)
Sunday, May 17, 2015
diy "canvas" prints
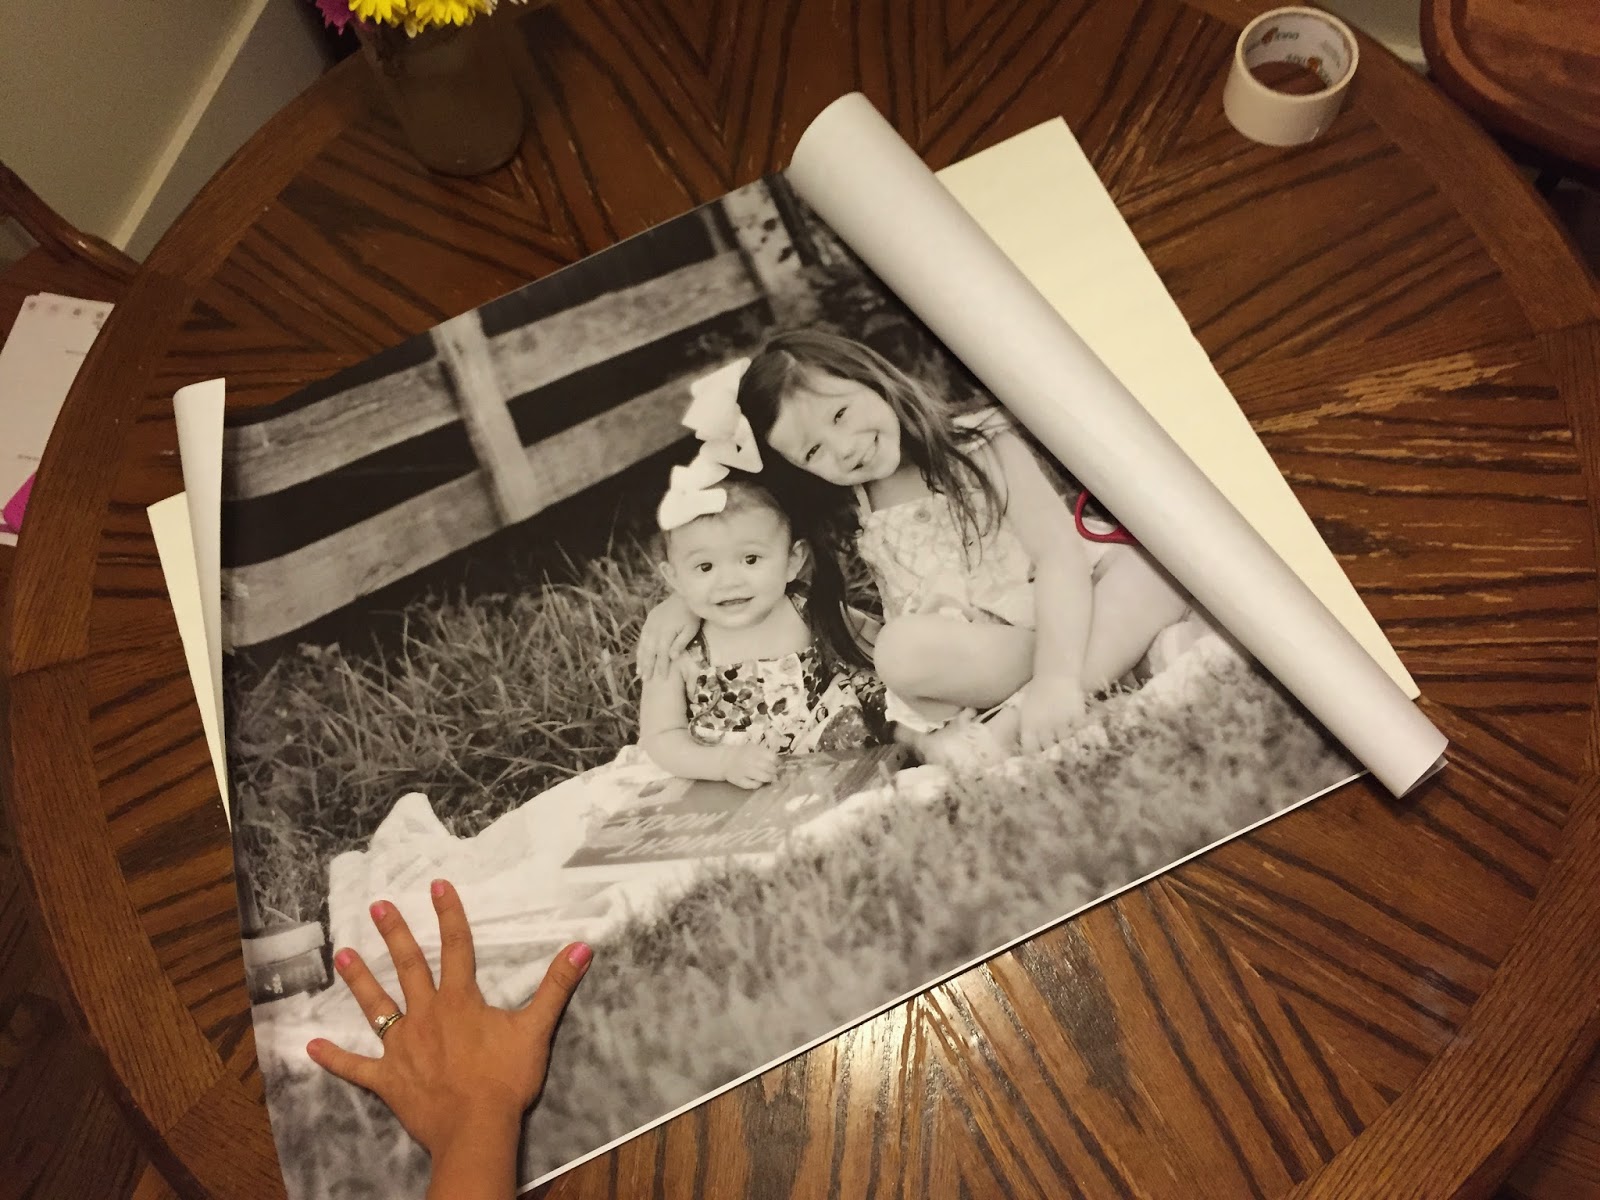
I looked in to making poster prints that I could just mount in a big frame, but then I had an "AHA!" moment in Dollar General when I ran across the foamboard... LOL. Yes, a $1 piece of foamboard. Okay, so they're not really "canvas" prints, but they are a lot cheaper and just as sweet! I tried it out with prints for my living room first and I love them!
So, if you want to stick around for the tutorial here it is. I am loading it with more than enough pictures... not to complicate you, but because I am a visual person. It will literally take you less time to complete this project than it will to read my tutorial. Here's the best part: It cost me less than $10!!!
1. Go online to Staples' Copy and Print Center and click on "B&W Engineering Print" (only $3.89!). That price can't be beat! A local place quoted me $24.50 each but I ended up getting 4 prints at Staples for less than $20! Upload a picture (or a few) from your computer. Do not use iPhone/cell phone photos because they will be grainy. All the photos I uploaded were taken by my sweet friend Codie at White Cotton Photography. (Check out her work at the link!) I did the 24x36 inch size. Submit your order and pick-up your prints. :)
2. Gather your supplies. You'll need just a few things!
- your print
- Elmer's spray glue
- scissors
- duct tape (any color--I used white)
- a piece of white foam board (DG-$1)
3. Lay your print on top of your foam board like you want it. The edges will hang over like mine below.
4. Spray one end or corner of the foam board and smooth it down with your hand. This will hold the print in place for you to spray and smooth out the rest to make sure there aren't any bubbles. Don't press too hard, it will rub black ink off onto your hands.
5. Flip it over. You'll notice that the sides hang off. Spray two parallel ends and fold over. Then, as if you are wrapping the ends of a present, fold the corners in and spray the other two ends down.
6. After you fold all the corners and spray down all the sides, duct tape it down to hold it tight. Then, you're done! You can hang it with Command picture hanging strips. I only used one pack for all four prints. (Pardon the cooling strip on Addie's head. She swore she needed it for her imaginary fever. Ha!)
Voila! That's all folks! Easy peasy. If you make some please share with me! I want to see! :)
Subscribe to:
Posts (Atom)